Categories
- Buy IndiaFont
- Getting Started
- How it Works?
- Important Links
- Support
- Technical Guide
Install IndiaFont on MacOs
Let’s see how we can install IndiaFont V4 for macOS!
Installation for macOS is quite easy, just follow the steps below and you will be ready within a minute or two.
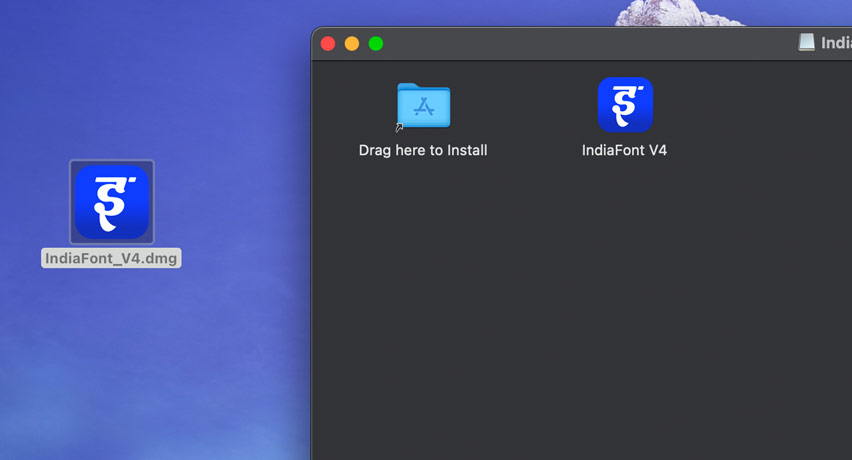
Step 1: Open the DMG file that you have downloaded.
Once you have downloaded IndiaFont V4 for macOS, just extract the ZIP file and open the DMG file as shown in the image.
Step 2: Drag IndiaFont_V4.dmg to the Applications folder
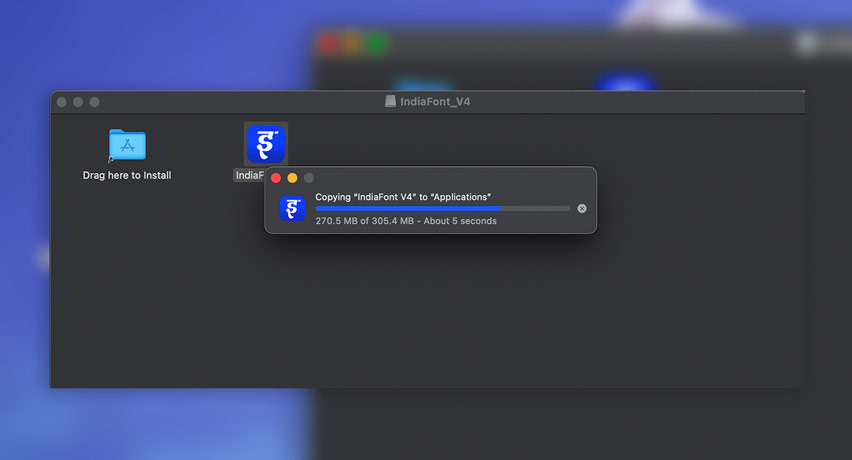
Now drag the “IndiaFont V4” file to the applications folder to initiate the installation process. Shown in the below image.
Step 3: You may encounter the “Not Verified Message”
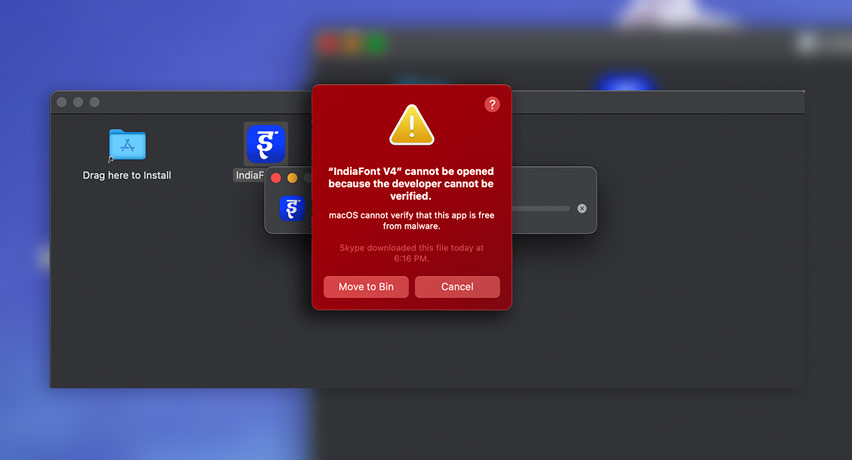
Now you may face the issue with the message shown in the below image, but worry not… Do nothing here. Let’s see how we can solve that in the next step.
Step 4: Open System Settings
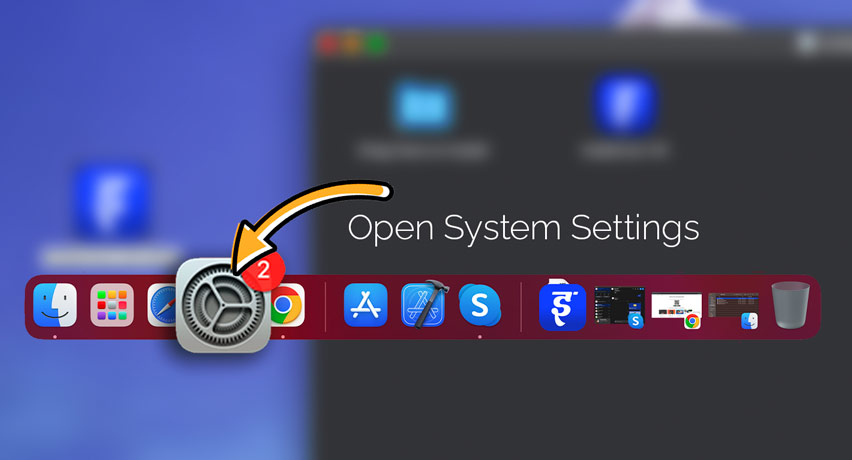
Open your System Settings, for easy navigation please refer to the image given below.
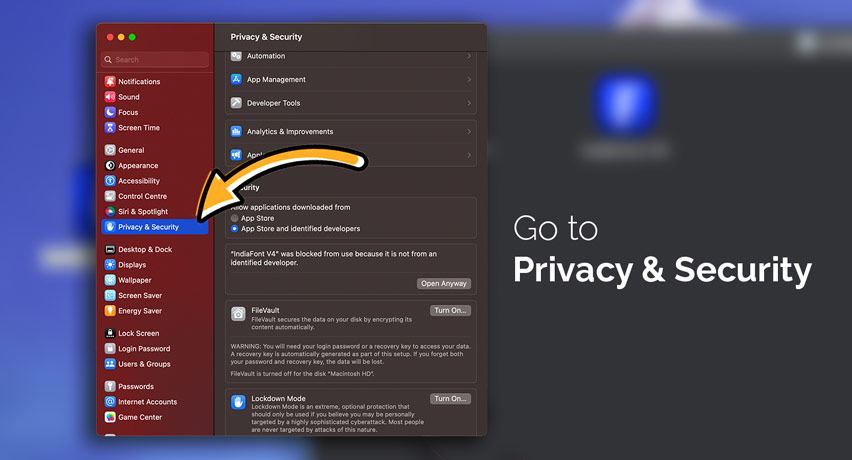
Step 5: Go to “Privacy & Security”
Once you open System Settings, please go to “Privacy & Security”.
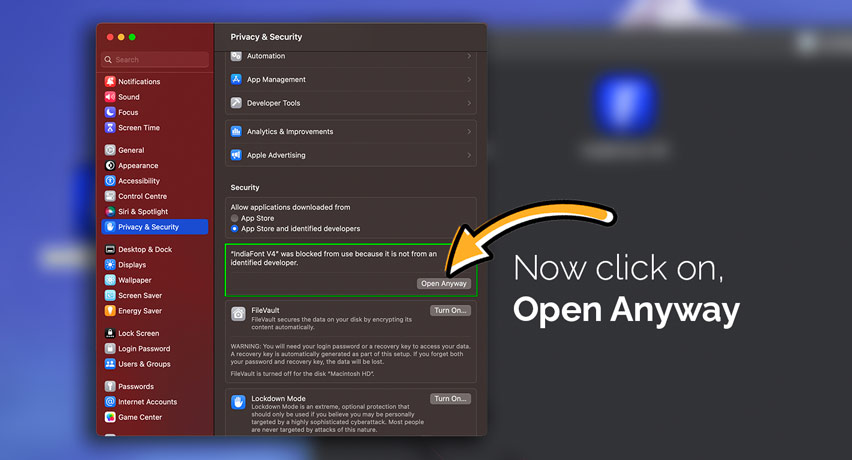
Step 6: Grant your Permission
You will see the message as shown in the below image, please click on the “Open Anyway” button.
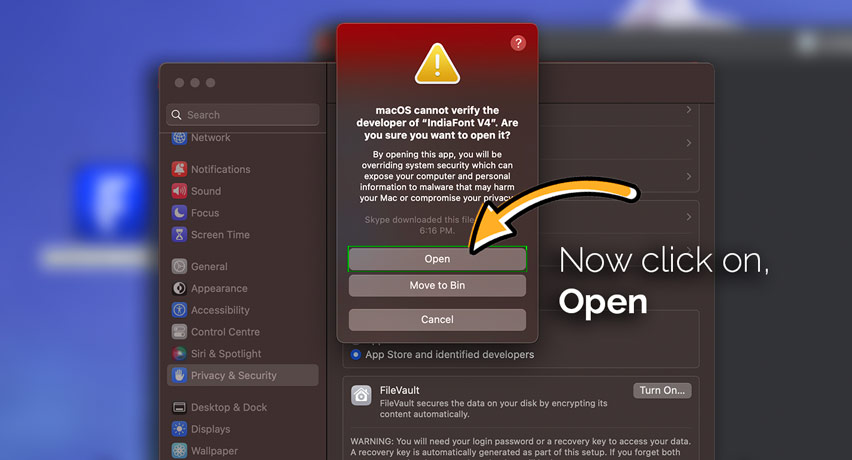
Step 7: Verify and Open
Here you will get an alert with the message as shown in the below image. Please confirm and click on “OPEN“.
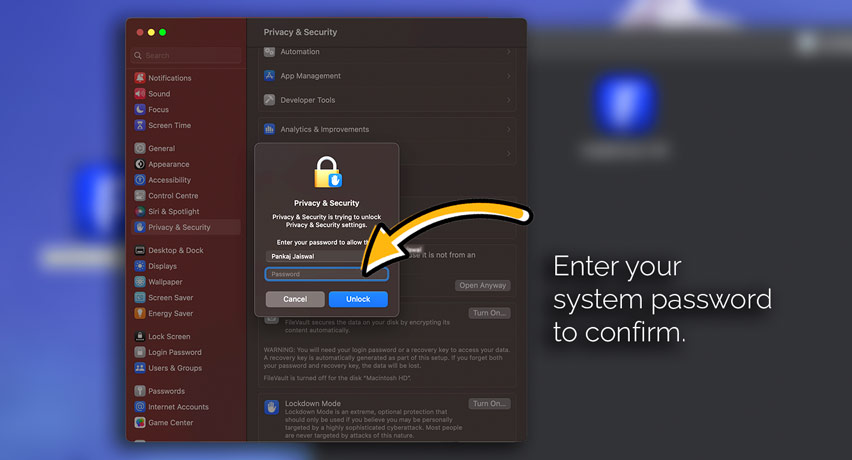
Step 8: Authentication
In the last stage, Mac will ask for your password. Just put it in there and authenticate.
That’s it, installation of IndiaFont V4 will start now and it shouldn’t take more than a few seconds. I hope you can install IndiaFont V4 with this help article. If you need any help, please do not hesitate to contact us.

